Events
Events is a simple mechanism for using tcPDU as an automaton that performs programmed actions in the event of certain conditions. For example, turn on the OUT1 when the temperature exceeds a certain value or send an e-mail when the logic state changes, etc. It is possible to combine two conditions using a logical operator and additionally make the execution of the action conditional on the state of another event entry.
Page elements
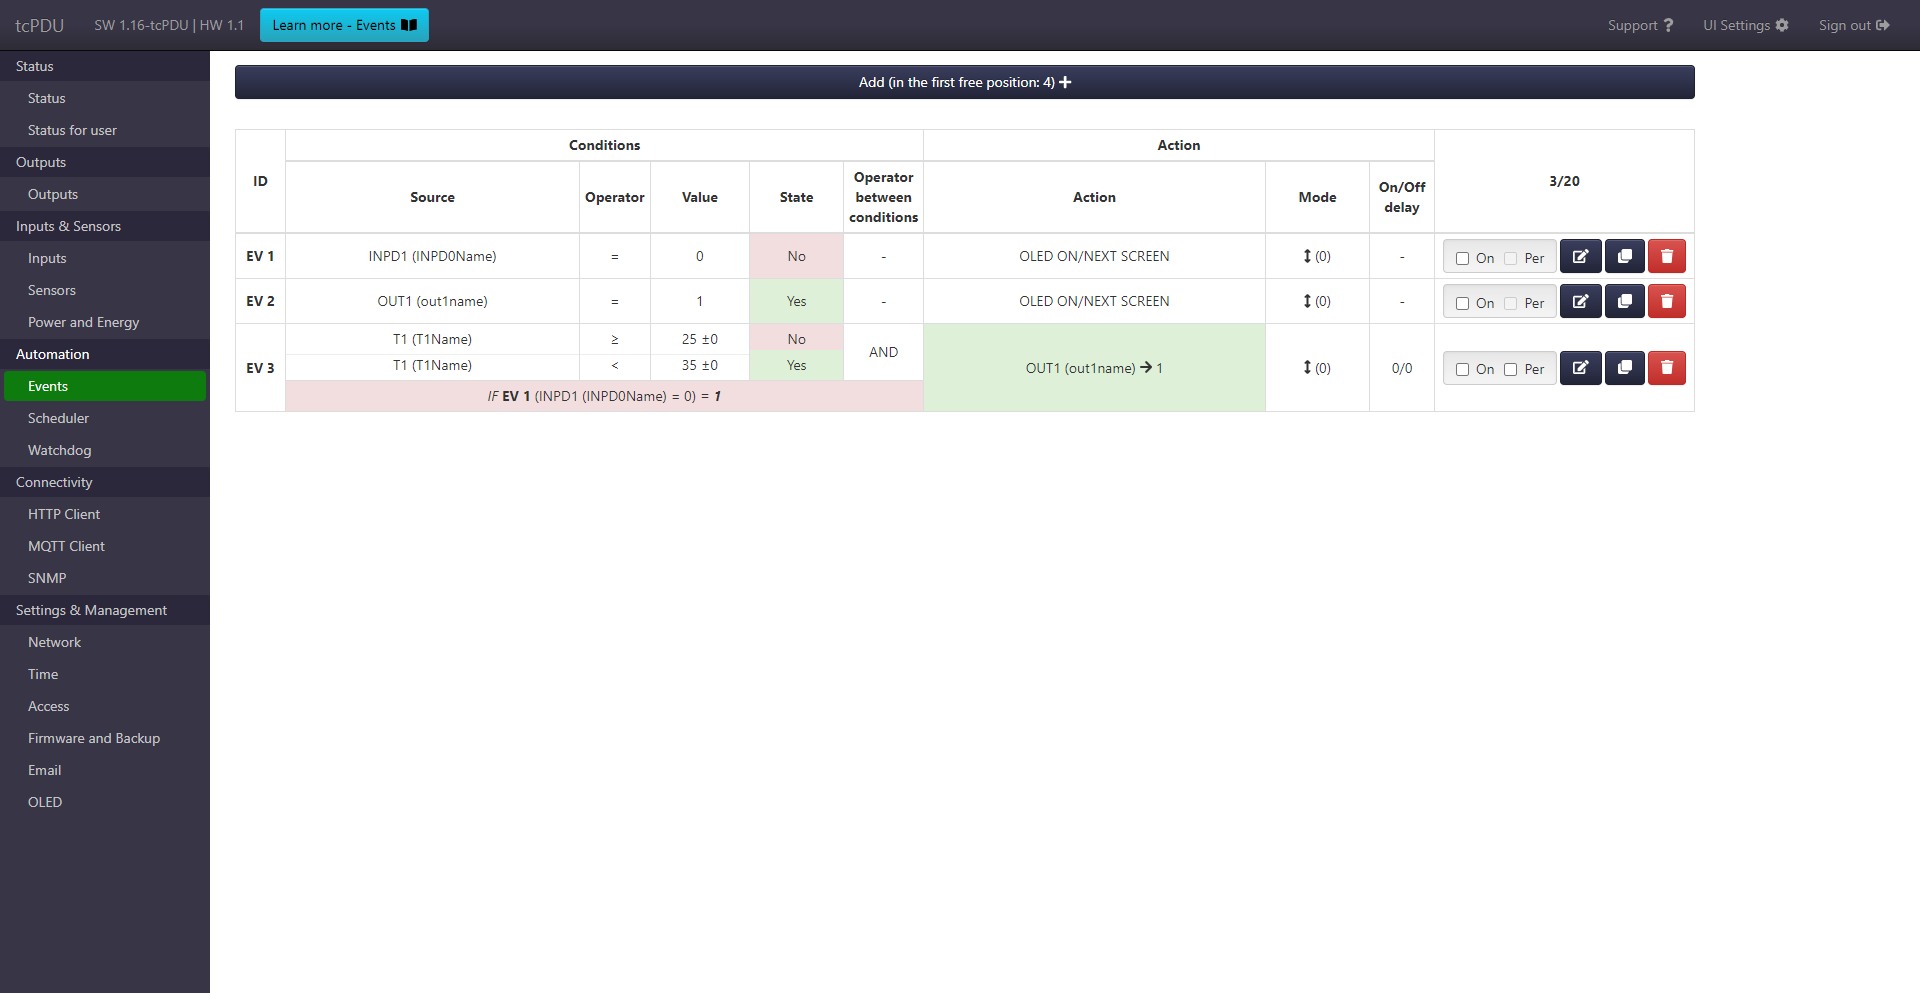
The page shows a table of events. It shows information about set events, current state of conditions (No / Yes) and whether the result of OUT, VAR, AutoSwitch is currently true (e.g. checks if OUT1==1) .The last column contains checkboxes to enable the event (On) and make it permanent (Per), and buttons to delete, edit or copy the event.
Above the table there is a button to add a new entry.
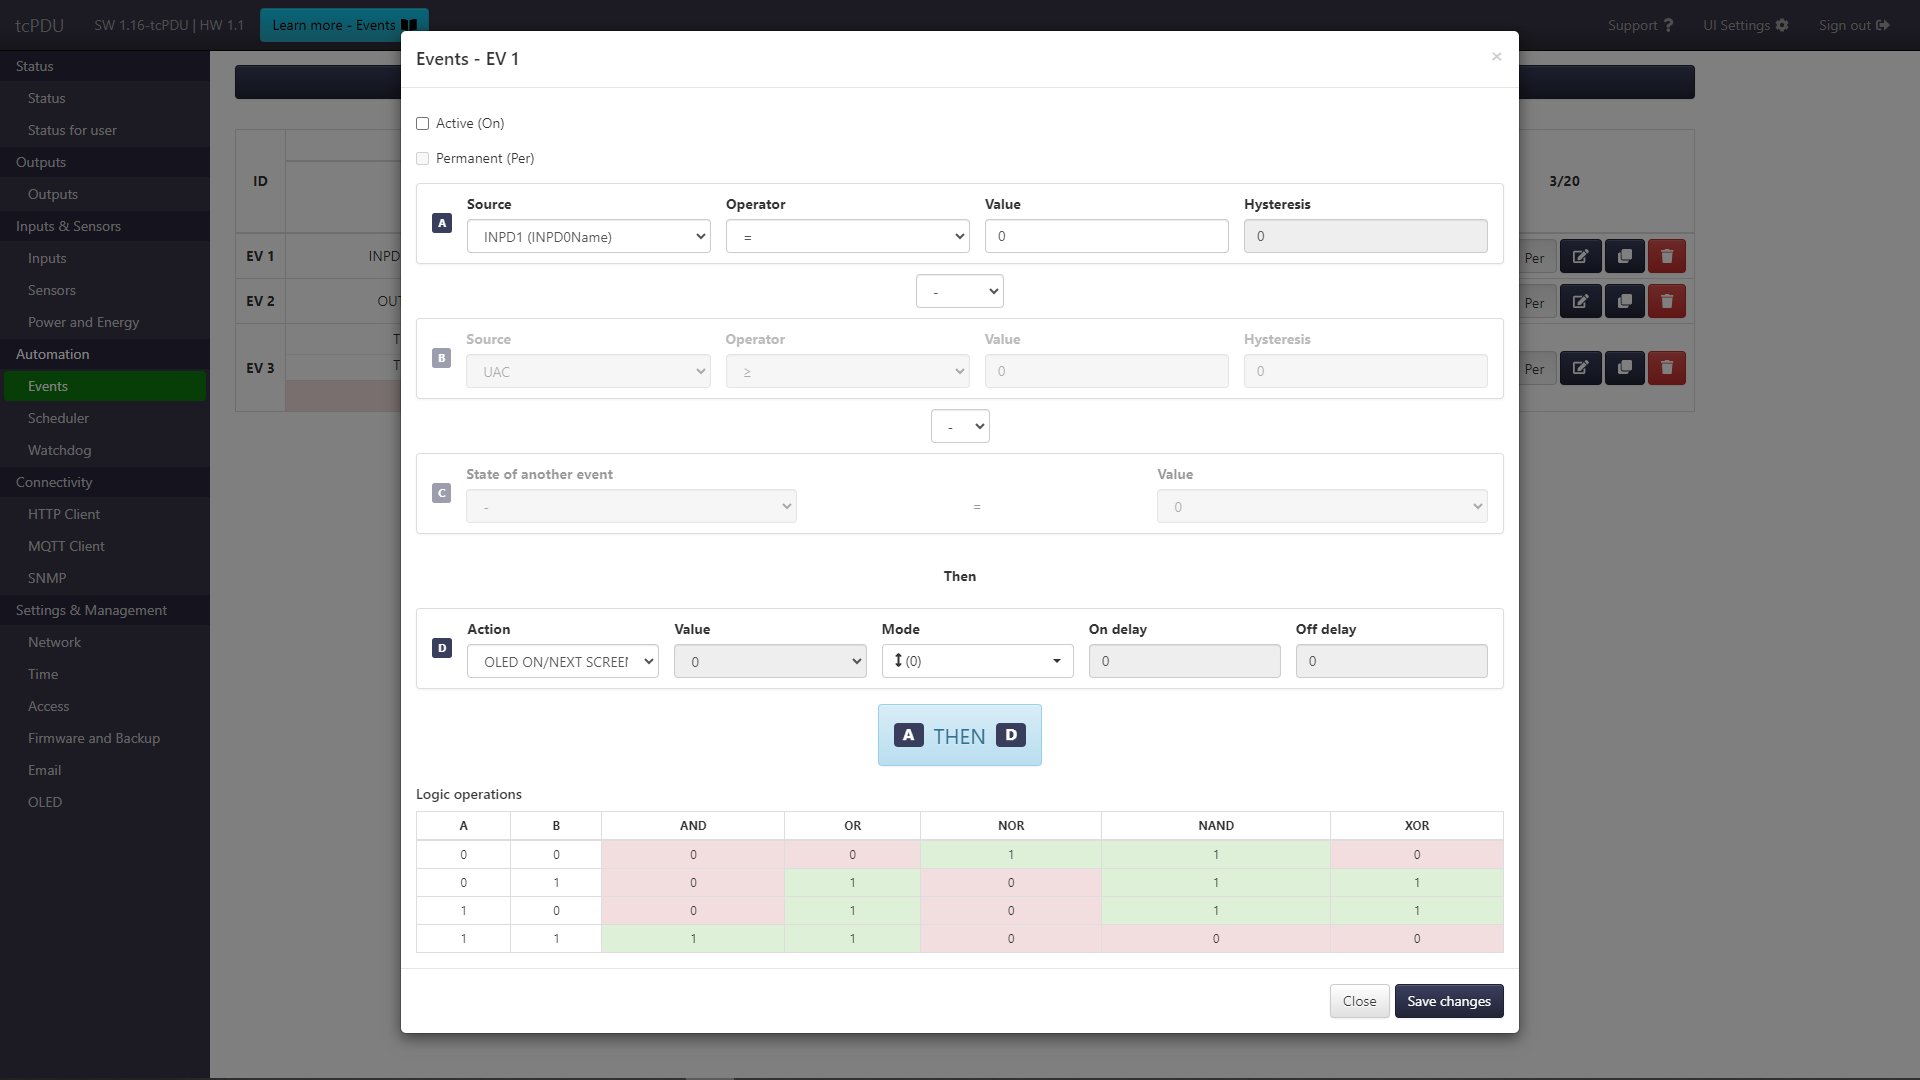
Window with the form for adding/editing an event. From above, it contains the following elements:
OnandPercheckboxes to enable the event and make it permanent.-
The first condition (A, basic). The condition consists of 3 elements:
- source - analog and digital inputs. Among the digital input options, there are also VAR virtual variables (described below).
- the operator
>=,<(for digital inputs the=operator is always used) - reference value and hysteresis
-
The operator between conditions (A and B) allows you to link two conditions with each other. If the operator is not selected (left with value
-), then the second condition will be inactive. - The second condition (B) is active only when an operator between the conditions is selected (point 3).
- Operator that activates a special condition C, which allows making an event dependent on the result of conditions A and B of another event.
-
Condition (C) specifying the dependence on the state of the conditions of another event. This means that the action of the event is executed only when the condition C is met, i.e. the conditions A and B of another selected event.
For example, in the first image above with the event table, the action of the EV 3 event will be executed only if its basic conditions A and B are met and the C condition, which here is the A condition for the EV 1 entry . The important thing is that if condition C is not met, no action will be performed, including the moment when condition C stops to be met.
This can be used in conjunction with the Scheduler function to define day-night activities. For this purpose, in Scheduler it is necessary to control, for example, the VAR variable, so that its setting to 1 defines the day, and to 0 the night. In events, add an entry with a condition that checks the state of the selected VAR variable, with any action, without having to activate this entry - it is enough that it is set. Next, add the sets of events for day and night, so that these "for day" will be with the condition C = 1, and "for night" with C = 0.
-
Action to be performed when the condition is met.
It is defined by the following parameters:
- Action - setting the state of the OUT output, enabling the AutoSwitch function for the output, sending an HTTP request, sending an SMS and others.
- Value - to be set for OUT, VAR actions, for which it defines what value will be set on the output or variable.
- Mode - allows you to specify when the action will be performed: when the condition begins to be met, when it stops being met, or both (default behavior).
- On delay - to be set for OUT, VAR actions, delays the activation of the action after the condition is satisfied.
- Off delay - to be set for OUT, VAR actions, delays the deactivation of the action after the condition is no longer satisfied.
Action when the condition is no longer met
Once the condition is no longer met, some actions have a special effect:
- OUT, VAR with a value of 1 or 0, will work as if with a value opposite to the set one, e.g.
OUT1=1will work asOUT1=0for deactivation. - eMail, SMS will send the second variant of the message (their configuration forms contains 4 pairs of double entries - for activation and deactivation of event).
- AutoSwitch remembers the state of the output before starting the AutoSwitch action, so that when the event ceases, the output returns to the state it was before the AutoSwitch action.
Action of events and the
PeroptionNormally, an event action is executed when state of its condition changes (satisfied or not). For analog sources, this means that the action will be performed when going over the threshold both up and down. For digital sources where there are only two states, the action will be performed virtually every time the value of the source changes.
However, with the
Peroption, ie a permanent event, the action is executed as long as the condition is met. Option to be used with OUT, VAR actions, over which the event takes control, ie they cannot be changed then outside of events (each change will be overwritten with the change from the event). -
Table of logical states.
An auxiliary operator action table, showing the operator's possible results depending on the conditions.
Variables VAR
VAR variables can have a value of either 0 or 1. They can be used as a source in Events and as an action in Events and Scheduler. Their value can be changed not only as a result of the aforementioned action, but also by the HTTP/MQTT command (varX=Y).
As a result, you can prepare different variants of events, depending on the VAR variables. For example, in Scheduler, set VAR at given times, and in Events, as one of the conditions, use the dependency VAR, similar to the screenshots below. In the example, OUT1 is switched on at a lower DS1 temperature during the day, between 7:30 and 19:30 than during the night.

